Last updated: 2026-10-28 by Ted Sellers, Owner
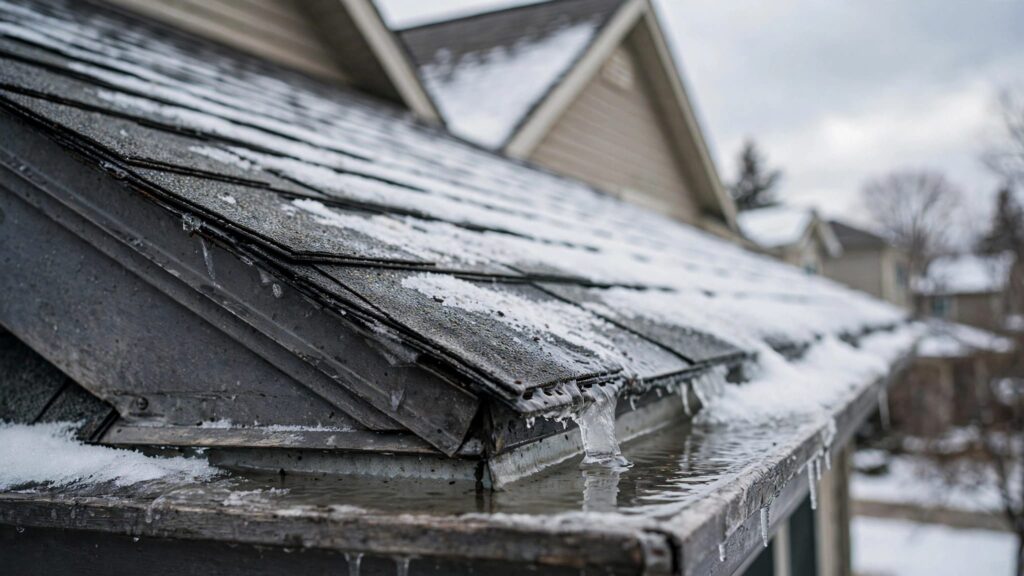
Yes. Ice-dam water can get behind rake flashing when backed-up meltwater reaches open shingle laps, fastener holes, or a poorly integrated roof-edge detail. Rake flashing sheds water along the sloped gable edge, but it isn’t a waterproof barrier against ponding; protection depends on an intact roof covering, correctly layered flashing, and continuous ice-and-water membrane beneath vulnerable areas.
What Actually Causes Ice Dam Leaks on Shingle Roofs in Harsh Winter Climates
When this applies
This applies mainly to Minnesota homes with asphalt roof covering, cold overhangs, and snow-covered roofs. The vulnerable location is often the lower corner where the sloped rake meets the horizontal eave.
A roof rake is a snow-removal tool. Rake flashing is the metal edging along a gable. They’re different components.
Water staining near rake metal doesn’t establish the entry point. Water can enter farther upslope, travel along decking, and appear at the gable. Condensation, wind-driven rain, and failed wall flashing require separate diagnoses.
Metal roofing can also develop ice dams, although its seams, closures, and snow-shedding behavior require different inspection methods.
How water reaches the roof edge
Heat escaping through the ceiling warms roof decking and melts snow underneath. Runoff reaches the colder overhang and refreezes. Repeated thawing builds a ridge that blocks drainage.
The University of Minnesota’s ice-dam guidance describes how backed-up water enters roof-covering openings.
At a vulnerable rake corner, water may reach beneath the roof covering or poorly layered metal. Intact sheet metal doesn’t transmit water through itself. Open laps, penetrations, and missing membrane create the path.
How to Inspect and Document the Damage (Field Checklist)
Start below the roof
Inspect from stable ground first. Photograph the entire slope, then the affected corner. Record whether leakage follows sunshine, rising temperatures, or overnight refreezing.
Inside, document ceiling stains and wet insulation without entering unstable areas. Keep people away from bulging ceilings and wet electrical fixtures.
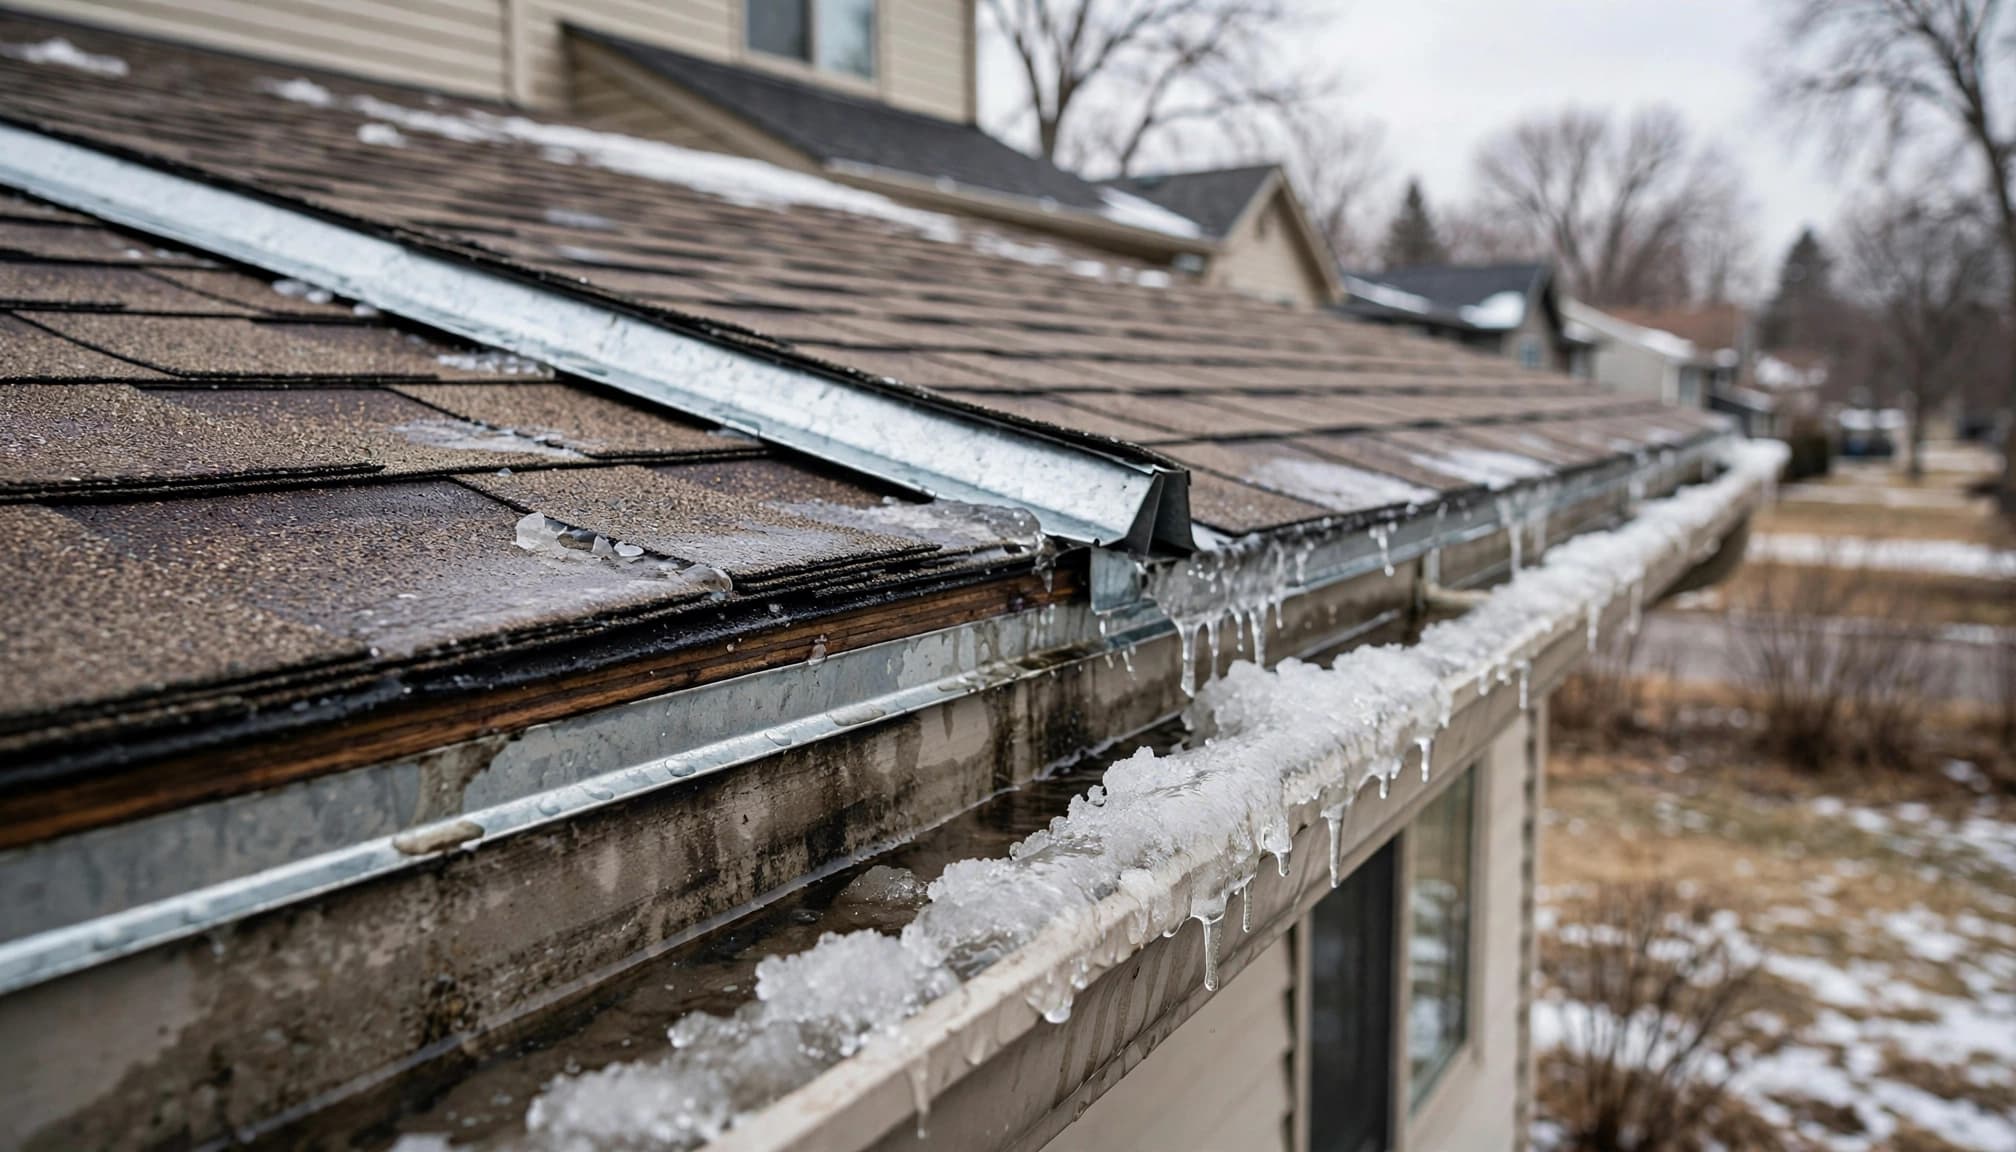
Bent gutters or stained fascia can accompany ice-dam gutter damage, but they don’t prove that the rake flashing failed.
Follow the water path after safe access
A contractor’s inspection should follow this sequence:
- Look for deck deflection, sagging rooflines, and displaced gutters before accessing the roof.
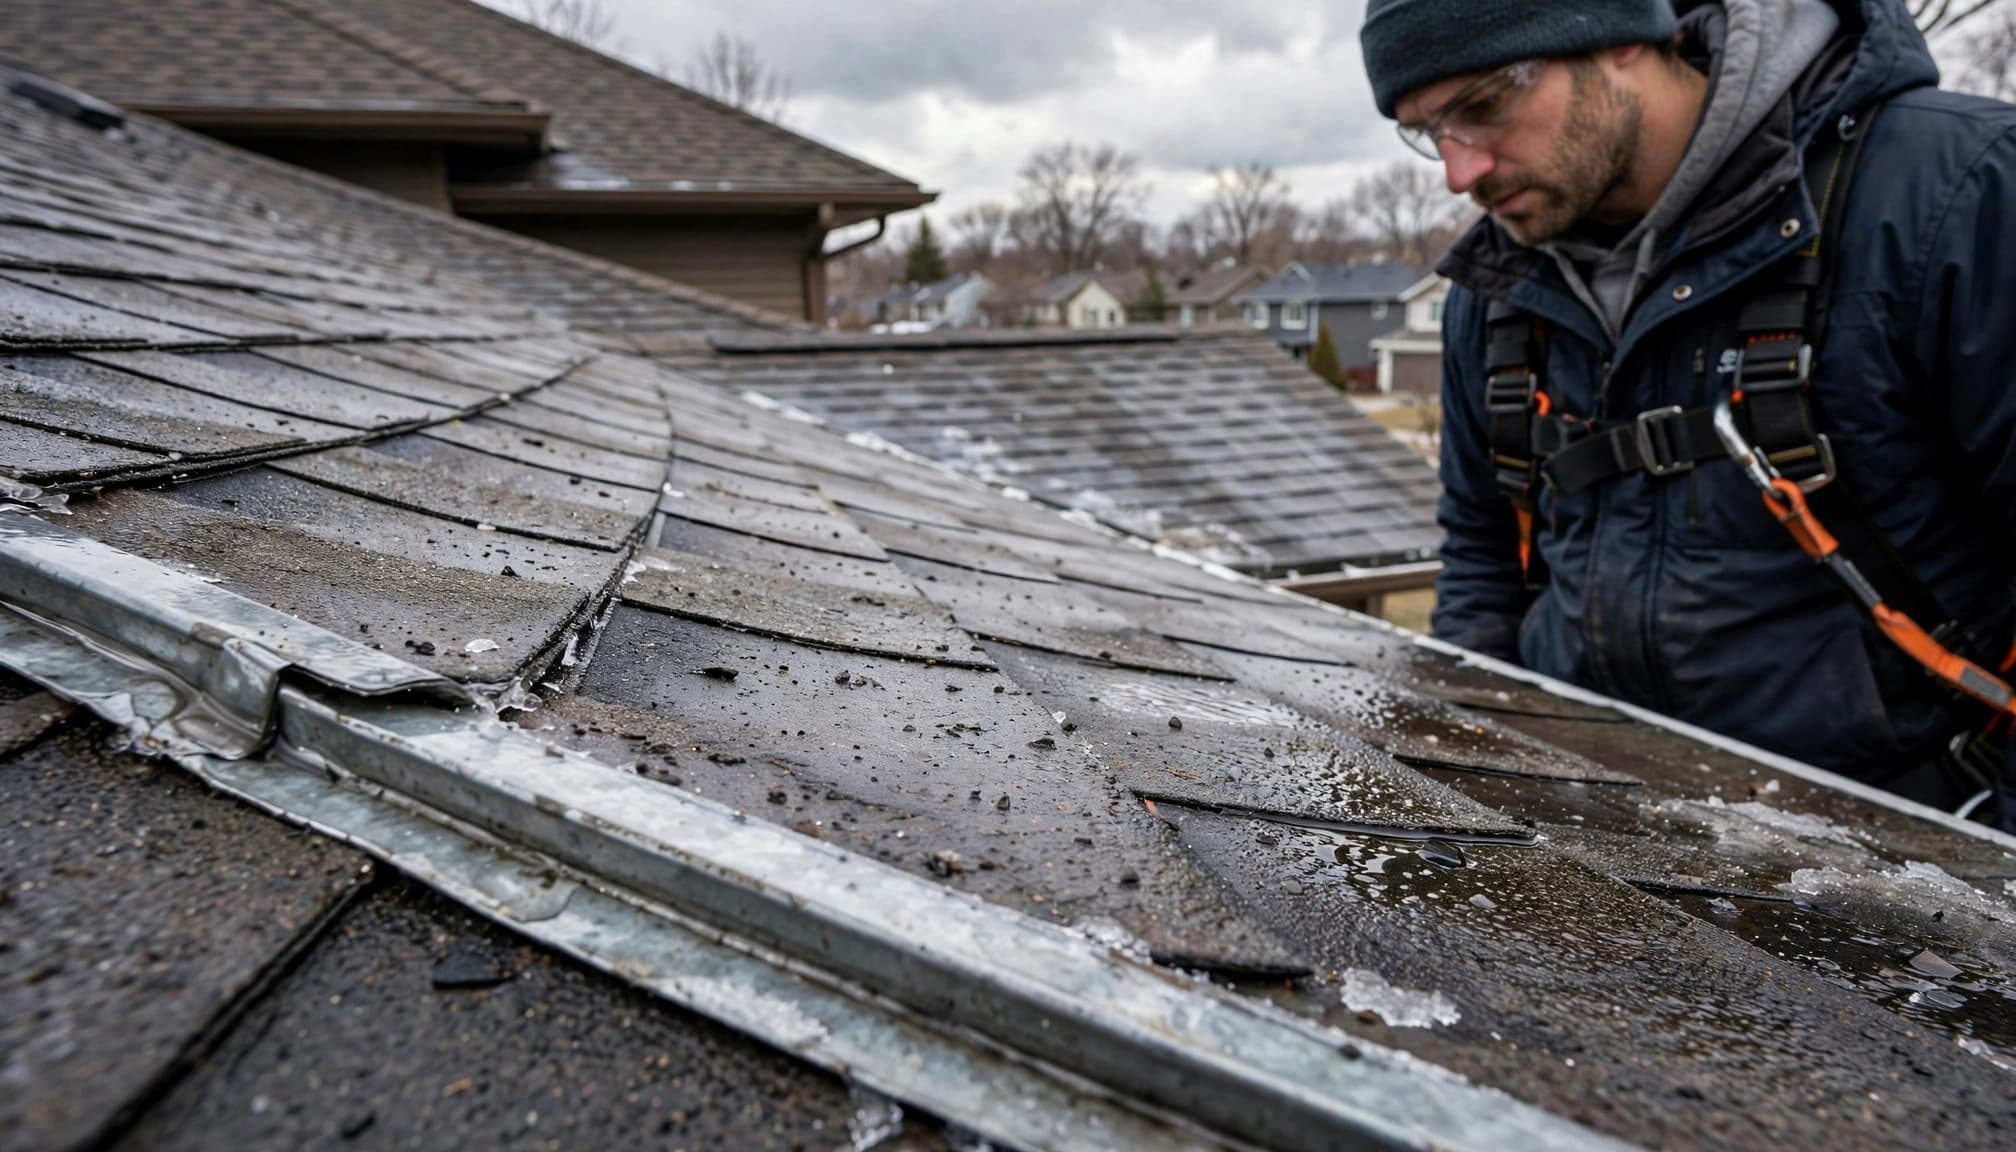
- Record granule-loss patterns, scraped bands, cracked asphalt tabs, and lifted tabs near the eave as signs of shingle damage.
- Inspect rake-flashing separation, corner joints, fasteners, and exposed wood.
- Follow valleys uphill for trapped ice, displaced metal, debris, and damaged shingle transitions.
- Examine pipe-boot cracking and nearby penetrations before tracing moisture through the attic.
Strip-like scraping suggests tool contact. Scattered granule loss alone doesn’t prove hail damage. We distinguish ice-related damage from a storm-damaged roof through the complete pattern.
A sagging deck needs structural assessment. Don’t send someone onto it to obtain closer photographs.
Repair vs. Replace: The Decision Framework
The decision depends on concealed moisture and remaining roof condition, not the size of the ceiling stain.
| Factor | Localized repair | Full replacement |
|---|---|---|
| Budget allowance | About $500 to $1,500 for limited flashing work | About $650 to $1,100 per roofing square for architectural shingles |
| Remaining service life | Sound, flexible roof covering surrounding an isolated defect | Brittle shingles or widespread deterioration |
| Insurance implications | Document the damaged area and covered repair scope | Requires support for broader covered damage |
| Material compatibility | Matching replacement materials and compatible membrane remain available | Existing materials cannot support a durable tie-in |
| Deck condition | Limited damaged sheathing | Widespread rot or repeated wetting |
When residential roof repair makes sense
A separated flashing section with sound decking may need selective removal of the roof covering, replacement edge metal, and a properly integrated membrane patch.
Sealant smeared over the exposed joint doesn’t establish drainage beneath the roof covering. The repair must connect to the existing water-control layers.
When replacement becomes the better scope
Residential roof replacement becomes more reasonable when roofing tabs break during lifting, several edges leak, or deteriorated decking extends beyond a localized repair.
An ice dam alone doesn’t establish a replacement requirement. Likewise, replacement without correcting major attic heat loss leaves the conditions for another dam.
A new roof can improve water protection while the same attic air leak continues melting snow above it.
Material Specs That Matter for This Repair or Replacement
Shingles, underlayment, and edge metal
GAF Timberline HDZ, CertainTeed Landmark, and Malarkey Legacy are architectural-shingle options. Legacy’s Class 4 impact rating concerns laboratory impact resistance. It doesn’t make the roof ice-dam-proof.
Synthetic underlayment and felt provide secondary protection, but neither automatically substitutes for a specified ice barrier.
Minnesota residential provisions generally require the eave ice barrier to extend at least 24 inches inside the exterior wall line. That isn’t merely 24 inches upslope from the gutter. Overhang depth and roof pitch affect coverage.
Valley membrane width follows the roof-system detail. The eave measurement isn’t a universal valley-width rule.
Rake metal must integrate with underlayment and roof covering according to the manufacturer’s detail. Exposed face caulk cannot correct reversed layering beneath it.
Commercial assemblies need different details
A commercial flat roof uses membrane terminations and perimeter metal rather than a conventional sloped-edge detail.
TPO roofing commonly uses 60-mil membrane. EPDM comes in 45-mil and 60-mil versions; thickness alone doesn’t resolve failed perimeter attachment. Modified bitumen and BUR need assembly-compatible flashing repairs.
Commercial roof repair must address wet insulation and failed seams before considering commercial roof restoration. Commercial roof coatings cannot correct rotten decking, loose edge metal, or trapped moisture.
If commercial roof replacement is being considered, Get a Free Commercial Roof Inspection to separate repairable perimeter defects from broader assembly failure.
Insurance Documentation and the Claim Process
Record the event and damage separately
A roof insurance claim should distinguish the weather event, the entry point, and the resulting damage.
Photograph snow and ice conditions, interior water damage and staining, wet insulation, and damaged materials before removal. Keep emergency-service invoices and record when dripping started.
For suspected hail damage, photograph individual impact marks alongside wider views showing their distribution. Record wind-lifted tabs, torn shingles, and displaced flashing separately.
Ice can expose an existing defect. Its presence doesn’t establish that winter weather created every damaged component.
Understand the coverage question
Adjusters evaluate the policy’s covered causes, exclusions, deductible, and documented loss. Contractors document physical conditions and the work needed to restore the assembly.
Some policies cover resulting interior ice-dam damage while excluding the underlying maintenance issue or thermal-barrier deficiency. Coverage doesn’t always require a storm-created opening; policy language controls that distinction.
Don’t delay emergency protection while waiting for an inspection. Preserve photographs, removed-material records, and written findings.
A repair estimate should separate emergency mitigation, roof repairs, drying, interior restoration, and prevention upgrades. Combining them into one unexplained total makes the scope harder to evaluate.
What a Professional Roof Contractor Does Differently
Step-by-step: control water without damaging the roof
- Protect occupied areas and isolate wet electrical fixtures. For active entry, Call 651-703-2336 for 24/7 Emergency Roofing.
- Assess access, falling-ice exposure, and roof condition before moving snow.
- For roof snow removal, pull loose snow from stable ground where safe. Keep the rake edge off shingles, flashing, and gutters.
- Start with accessible lower areas. Clearing the bottom 3 to 4 feet can restore drainage, but the dam may reform just below the new snow edge.
- Use trained crews for bonded ice. Low-pressure steam is a safer method of ice dam removal because it opens drainage without chopping or prying.
- After thawing, expose the affected assembly, inspect decking, replace damaged sheathing, and rebuild continuous flashing and membrane layers.
The Minnesota Commerce ice-dam safety guidance warns against damaging removal methods. Scraping ceramic granules exposes asphalt to weathering; catching cold shingle tabs can crack or curl them.
Correct the attic heat path
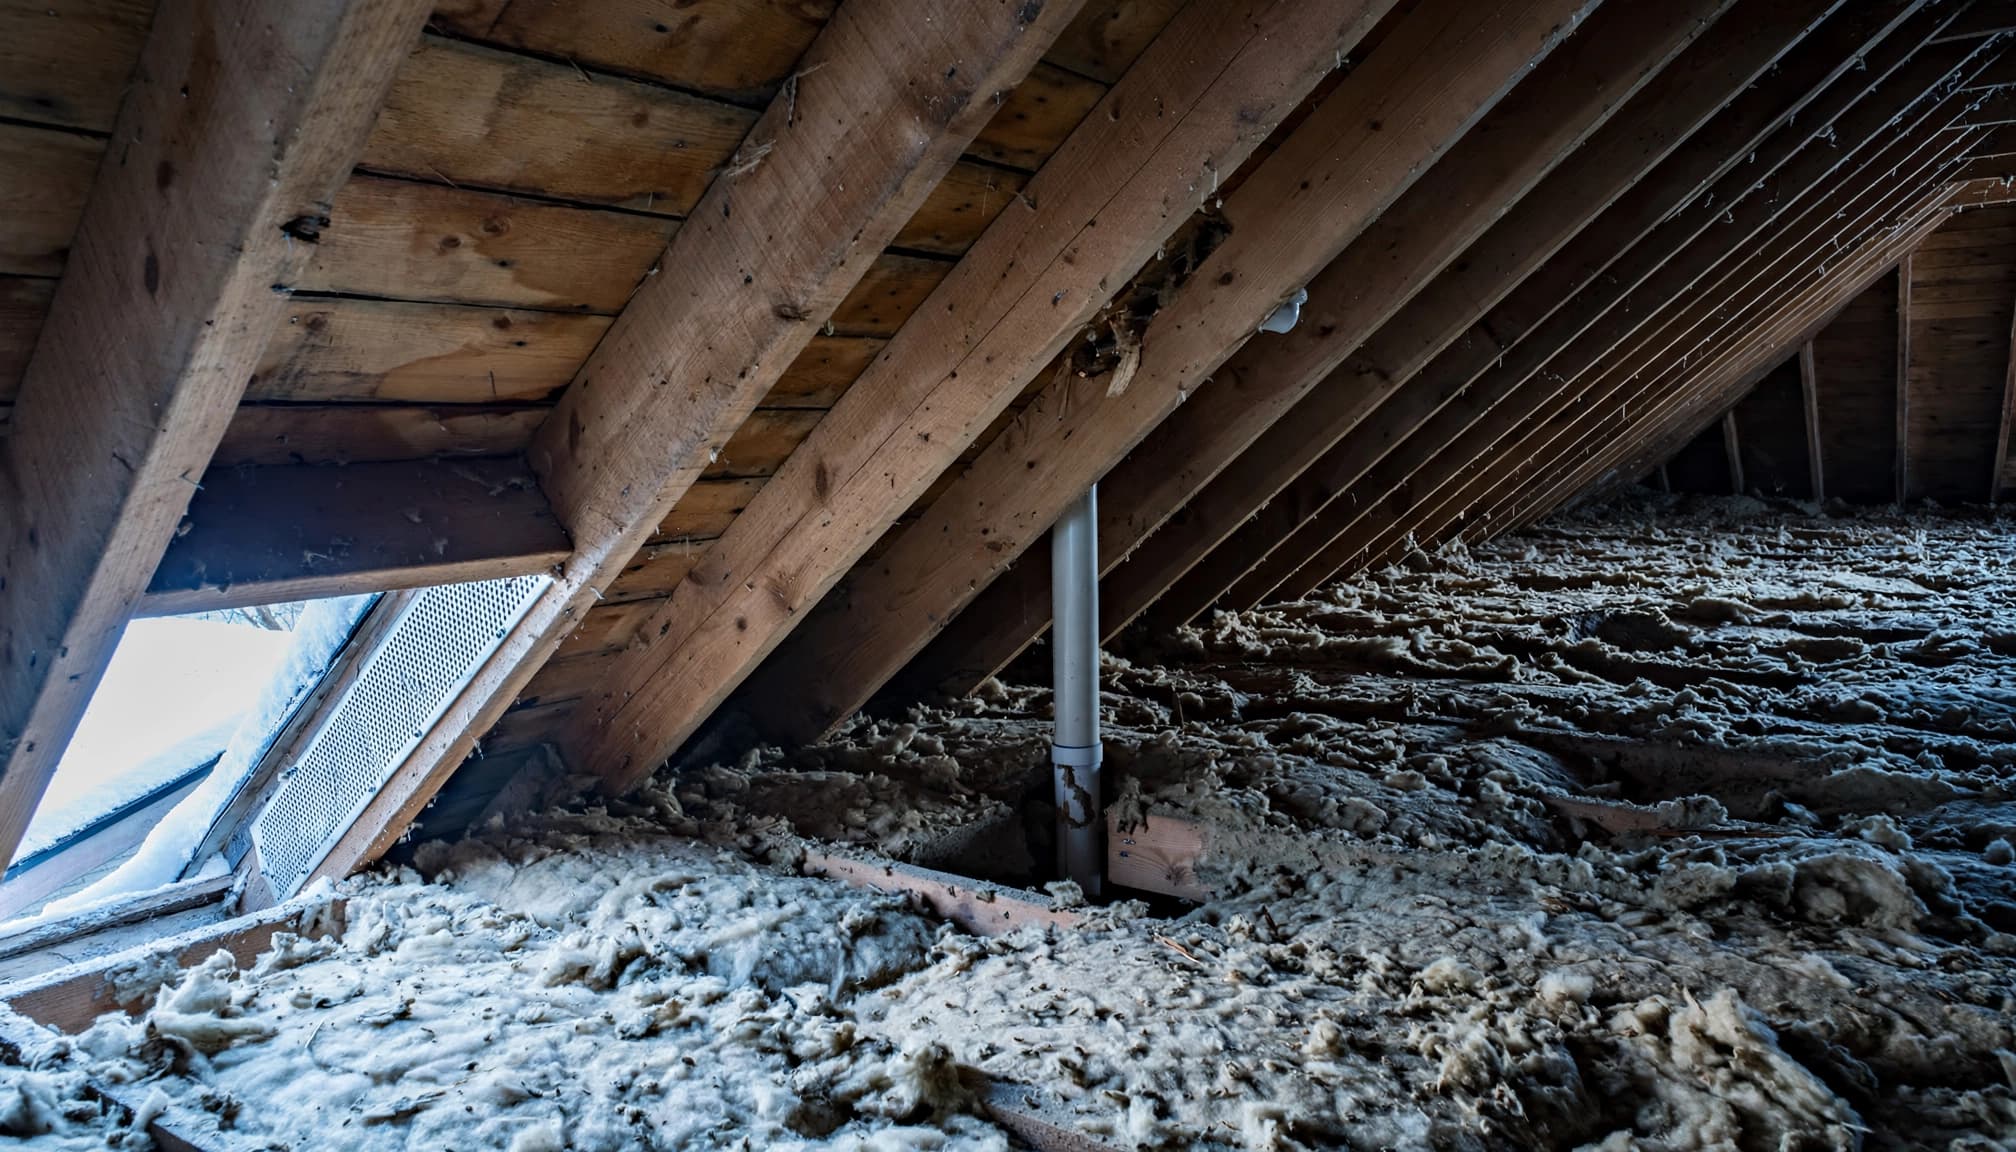
An attic bypass is an air gap around pipes, vents, wiring, or chases. Covering those gaps with batts doesn’t seal them. Seal air leaks with appropriate caulk or foam; hot flues require fire-safe clearances and materials.
Address recessed-light heat leaks and loose attic hatches before increasing the thermal barrier. Add attic insulation after air sealing.
Then calculate intake and exhaust net free area, clear soffit baffles, check that soffit vents are open, and assess ridge ventilation. Ventilation supports air sealing and insulation. It cannot overcome major ceiling leaks.
These steps support ice dam prevention. Replace failed pipe boots as part of the repair scope.
Cost Ranges for Ice Dam and Rake Flashing Repairs in Minnesota
Budget for the actual scope
Limited flashing repairs commonly require a $500 to $1,500 planning allowance. Concealed rot, multiple corners, difficult access, and brittle shingles increase that scope.
Architectural-shingle replacement budgeting around $650 to $1,100 per roofing square equals $6.50 to $11 per square foot. One roofing square is 100 square feet.
Deck condition, tear-off layers, disposal, roof pitch, and permit requirements affect pricing. Steam removal is generally time-based; ice thickness and access determine crew time.
Attic work is separate. Minnesota Commerce’s prevention guidance prioritizes sealing leaks before increasing the thermal barrier.
Choose snow tools by clearance and reach
The Avalanche SnowRake Deluxe 20 is an Avalanche roof rake with a 24-inch head, 20-foot reach, and wheels that help maintain roof clearance. The Avalanche 750 uses a slide and plastic wheels to reduce repeated pulling passes.
GoPlus 20Ft is an aluminum option marketed on price and durability. A plastic roof rake can still scrape shingles if you force it against the roof, and a snow shovel shouldn’t be used on asphalt roofing.
Older True Temper demonstrations cited about $60 at Home Depot and noticeable flex at full extension. That historical price isn’t a current quote.
Avalanche Combo Package 1000 bundles rake and slide equipment; earlier offers advertised about $15 savings.
The FLIR ONE Edge Pro is a thermal imaging camera that connects wirelessly to a smartphone. It shows surface-temperature patterns associated with heat leakage, but doesn’t see through roofing.
There are two practical reasons for snow removal: snow weight and ice-dam control. If snow weight is the concern, assess the roof’s capacity before raking.
Frequently Asked Questions
Will clearing only the lower roof move the ice dam uphill?
It can. Clearing the bottom 3 to 4 feet helps only while runoff has an open drainage route. Water may refreeze below the remaining snow. Don’t chase the new edge beyond safe ground-based reach.
What is the best tool for removing bonded roof ice?
Professional low-pressure steam is the preferred method for bonded ice. A snow rake removes loose snow. Eco Living Solutions markets non-salt ice melt pucks as an alternative to salt-filled stockings, but check roof compatibility before use. They don’t replace snow removal.
Can heat cables work with copper gutters and salt socks?
Only an assembly-compatible cable system belongs there. Chemical runoff and metal compatibility matter with copper gutters. Salt socks aren’t a standard companion to heat cables. Cables may maintain drainage channels, but they don’t correct attic heat loss.
Why is water still dripping after the ice dam is removed?
Wet insulation, sheathing, and ceiling cavities can release retained water after drainage resumes. Continued dripping can also indicate another entry point. Moisture assessment separates residual drying from an ongoing leak; don’t close wet cavities simply because the ice is gone.
Is the roofer responsible if an ice dam forms after replacement?
Responsibility depends on the contract, installation requirements, and documented defect. Incorrect flashing or missing specified membrane may be workmanship issues. Existing attic bypasses may fall outside the roofing scope. Formation of an ice dam alone doesn’t prove installation failure.
Keep the Water Path and Heat Path Separate
Key takeaways
Backed-up meltwater can reach behind rake flashing through vulnerable adjoining details. A durable correction addresses the damaged water-control layers and the attic conditions feeding repeated melting.
Put the repair scope in writing
For Twin Cities roofing work, the scope should identify flashing, membrane, decking, and attic corrections separately. If your Minnesota roof has leaked at the rake corner, Get a Free Residential Roof Estimate before approving a surface-sealant patch.
Related Roofing Services
Need a roof inspection in Saint Paul or the Twin Cities? Call Sellers Roofing Company at +1-651-703-2336 or schedule a free estimate. We are a black-owned, NMSDC-certified MBE roofing contractor with 9+ years experience.
